Now You Can Easily Etch Wine Glasses, Beer Mugs, Tumblers, Coffee Cups Or Almost Any Round Glass Container With The New Universal Glass Holder!
Here Is The Easiest Glass Etching System Available Today And You Can Learn To Do It For Fun And Profit In Just Minutes.
Instructions For Etching Glasses With The Universal Glass Holder
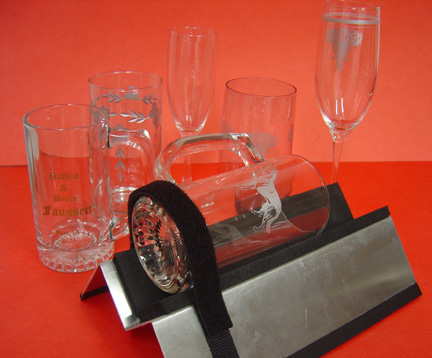
Here Are Just A Few Of The Many Types Of Glassware
You Can Etch In Seconds!
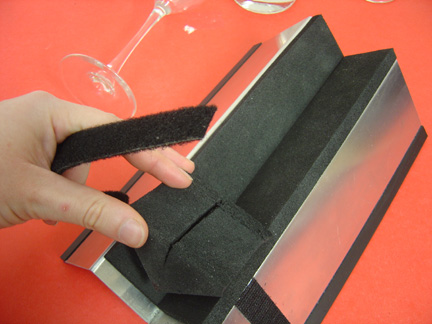
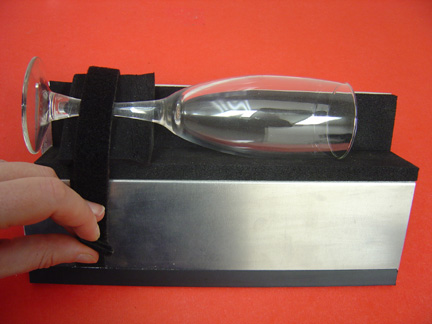
1. Place Stem Insert in Holder.
Here is a quick example of etching a Wine Glass. (NOTE: You can easily use this Universal Glass Holder to Etch almost any type of round glass easily.) The stem insert fits into the glass holder and provides a way to stabilize the stem of the wine glass. Place the stem insert on the velcro end of the holder.
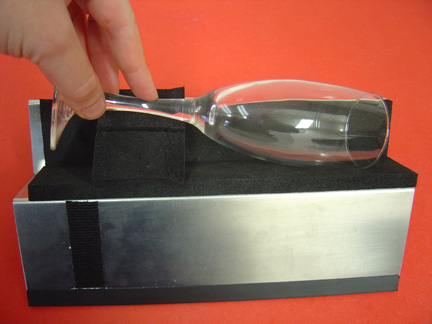
2. Place wine glass in holder.
Place the stem of the wine glass into the notch in the stem insert, and allow the top of the glass to rest on the padding of the holder. You can also secure parts of the glass with Scotch tape if you want it to be more stable.
3. Secure glass with Velcro strip.
Use the attached Velcro strip to secure the stem of the wine glass in the stem insert. With the stem inserted securely in the notch of the stem holder, and the Velcro strip holding everything in place, you now have a solid surface to hold your stencil.
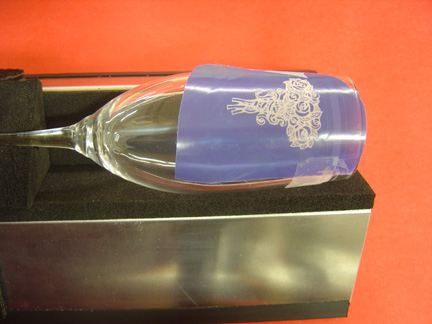
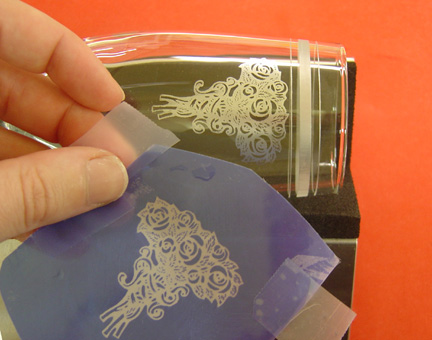
4. Secure the stencil to the wine glass.
Use a piece of Scotch tape to secure the stencil to the glass. Be sure to pay attention to placement and alignment on this step.
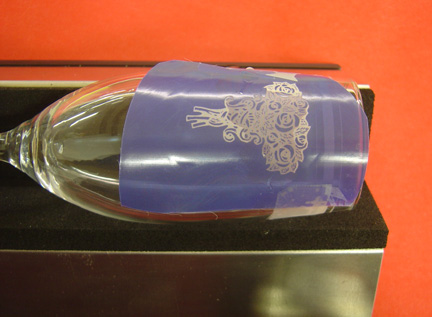
5. Apply activator.
Place a few drops of activator on TOP of the stencil directly over your copy so that the activator actually seeps thru the copy and gets under the stencil. A little bit goes a long way, and all you need to do is wet all the edges of the stencil that they adhere to the glass completely.
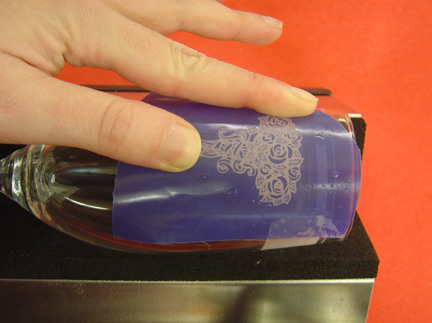
6. Smooth activator.
Use your fingers to smooth the activator through all the edges of your stencil. Make sure that you get all the internal edges as well as the external edges. Make sure that you smooth all of the air bubbles out from under the stencil. Any part of the stencil that isn't firmly in contact with the glass will etch poorly, so you want to make sure that there are no air bubbles. You might want to use a couple extra pieces of tape around the edges to make sure the full graphic stays in contact with the glass.
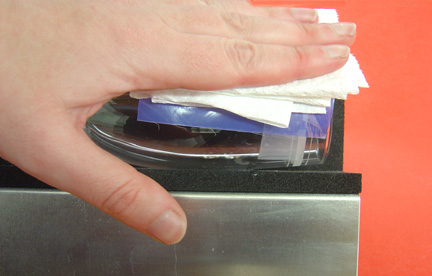
7. Blot off excess activator.
Once you have the stencil lined up exactly the way you want it, and the activator is covering all the edges under the stencil with no air bubbles underneath it, use a paper towel to carefully blot off the excess activator and PRESS DOWN firmly on the paper towel to squeeze the stencil to the glass.
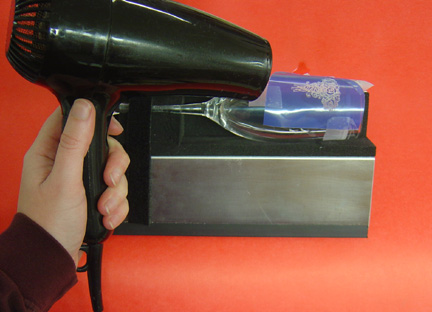
8. Blow dry activator.
Now that the activator is covering all the edges, we want to make sure that it stays that way, so we're going to blow dry the stencil onto the glass. You will be able to see the light part of the stencil change colors as it dries. While it's wet, it's a slightly green-ish color. As it dries it will turn white. Blow dry the stencil until the light part of the stencil is completely white. Check to be sure no air bubbles have developed during the drying process. If there are new air bubbles, simply re-apply activator, work the bubbles out, and re-dry.
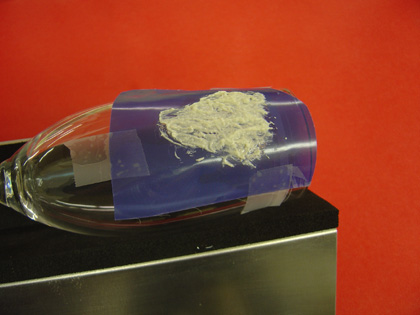
9. Apply etching cream
Use a Q-tip to apply etching cream over the top of the copy on the stencil. Make sure that you cover all the light parts of the stencil and be sure not to get any etching cream on parts of the glass that you don't want to etch. When using the Q-Tip be sure and press down firmly so that you actually press the cream thru the mesh that is in the stencil. This is IMPORTANT. If you do not get the cream squeezed thru the mesh completely you will not have a perfect etch. A little practice solves this.
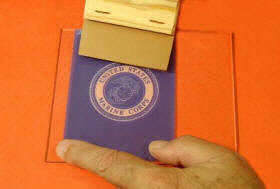
10. Squeegee etching cream.
Use the supplied squeegee to press the etching cream down into the stencil. Drag the squeegee across the stencil, concentrating on moving the cream down through the light (copy) parts of the stencil and onto the glass. Drag the squeegee across the stencil once in each direction. Be careful not to move the stencil in the process.
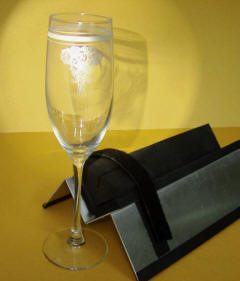
11. Remove stencil and enjoy!
Let etching cream act for 30 to 60 seconds, and then remove the stencil and quickly rinse any etching cream off of the glass. Dry the glass and appreciate your handmade artwork! The stencil can be rinsed and dried and used dozens more times. Also you can greatly enhance the etch by using Rub 'n Buff which is shown below.
Buy Now and Save!
This is a brand new item and we have made this special introductory offer so you can try it. The Universal Glass Holder is made of sturdy heavy-duty aluminum and 3/8” durable foam cushion. It comes with a slotted foam stem holder (which is removable) and Velcro securing strap. The unit is 10” long by 7” by 3” high, and it accommodates any glass up to 5” in diameter. It will last for a lifetime of etching and will Save You Time if you do any serious glass etching!
Try it Now At Our Introductory Price of $29.99.
This price won't last long, so
*glass not included
*Make Your Etchings Stand Out Much Brighter!*
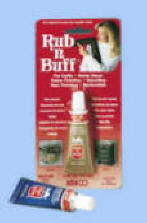
Use Rub 'n Buff to make your Glass Etchings stand out from the glass like never before. Simply apply it to the etched portions of your glass then rub it off with a paper towel. It adheres to the etched part of the glass and wipes away easily from the un-etched sections of the glass. It is Very Easy to apply and the SILVER color looks very much like the actual Etch on the Glass...Only Much Brighter.
 Use Rub 'n Buff to make your Glass Etchings stand out from the glass like never before. Simply apply it to the etched portions of your glass then rub it off with a paper towel. It adheres to the etched part of the glass and wipes away easily from the un-etched sections of the glass. It is Very Easy to apply and the SILVER color looks very much like the actual Etch on the Glass...Only Much Brighter.